Table of Contents
Introduction
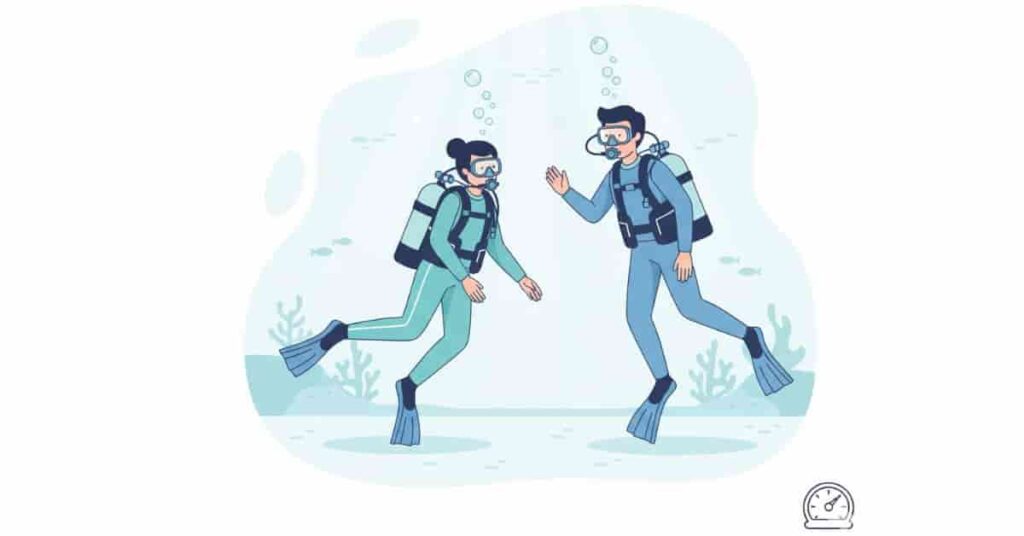
Have you ever felt nervous about floating up or sinking during a scuba dive?
A proper buoyancy check is the first step to safe and enjoyable diving. For new divers in the USA, learning buoyancy control is essential before exploring underwater environments.
A buoyancy check scuba diving routine helps you stay comfortable, save air, and maintain better control throughout your dive. It also reduces the risk of accidental contact with reefs and marine life.
Many beginners focus on equipment but forget the importance of proper weighting and balance. A good pre-dive check and in-water practice can make every dive smoother.
In this guide, you will learn how to perform a scuba diving buoyancy check step by step. You will also discover common mistakes and simple techniques to improve your neutral buoyancy skills.
What Is a Buoyancy Check?
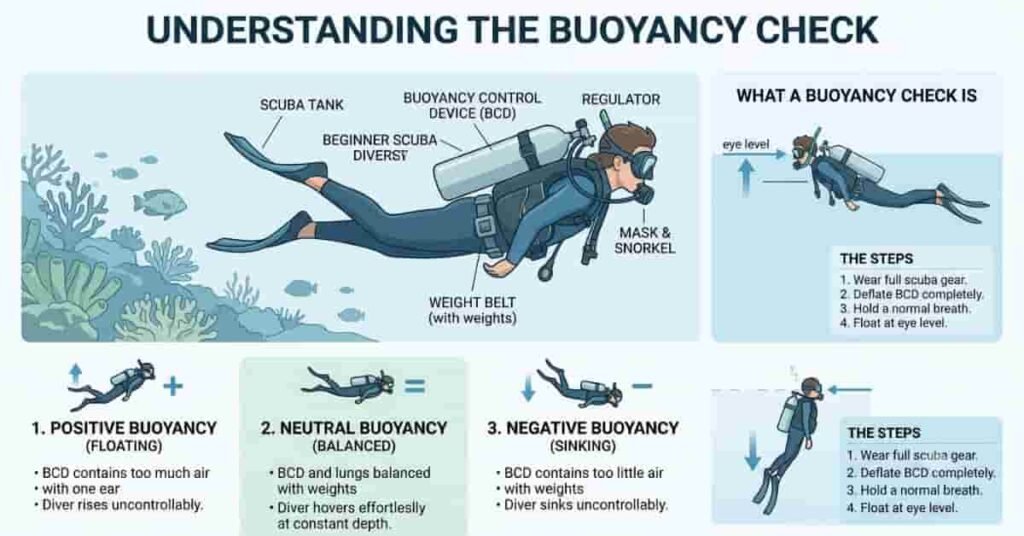
A buoyancy check scuba diving procedure helps you find the correct amount of weight and control your position underwater. It shows whether you can float, sink, or hover comfortably with proper breathing and equipment setup. Good buoyancy keeps your dives safer, smoother, and more enjoyable.
A buoyancy check is different from a regular equipment check. Your equipment check confirms that your gear works properly. A buoyancy check confirms that your body and gear can maintain a balanced position in the water.
Divers usually perform two types of checks. A pre-dive check happens before entering the water or at the surface. It helps you confirm your weight system and starting buoyancy. An in-dive buoyancy check happens during descent and at depth. It helps you make small adjustments as pressure changes affect your gear.
Beginners often carry too much weight because they worry about sinking. Extra weight can make breathing harder and reduce control. Learning proper buoyancy early helps new divers improve air use, maintain better trim, and protect underwater environments.
Expert Tip: Many experienced divers repeat a quick buoyancy check when they use different exposure suits, tanks, or equipment. Small gear changes can affect your underwater balance.
Preparing for Your Buoyancy Check
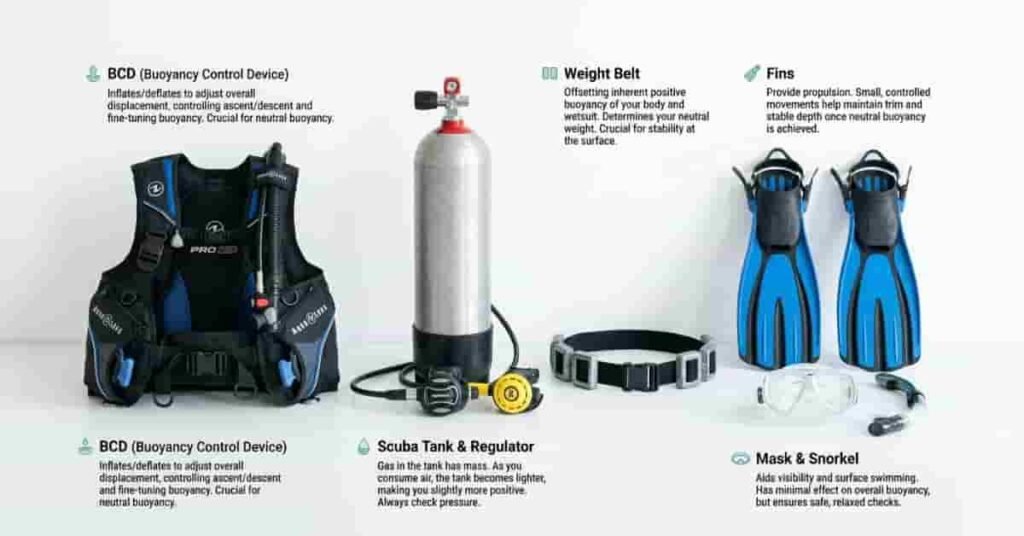
Before starting a scuba diving buoyancy check, prepare your equipment and review your setup. Proper preparation prevents problems during the dive and helps you focus on controlling your movement underwater.
Start by checking your main equipment:
- BCD: Make sure your buoyancy control device inflates and deflates correctly.
- Weights: Confirm your weight belt or integrated weights are secure and easy to release.
- Tank: Check that the tank is attached correctly and has enough air for your planned dive.
- Fins: Ensure your fins fit properly and allow comfortable movement.
Your tank and weight system have the biggest effect on buoyancy. Different tanks can feel heavier or lighter underwater, especially when their air supply changes during the dive. Your exposure suit also affects how much weight you need.
Before entering the water, complete a quick mental checklist. Confirm your gear placement, weight amount, air supply, and BCD function. Many divers also review their dive plan and hand signals before starting.
A few seconds of preparation can prevent unnecessary adjustments later. A well-prepared diver enters the water with more confidence and better control.
Step 1 — Pre-Dive Buoyancy Check
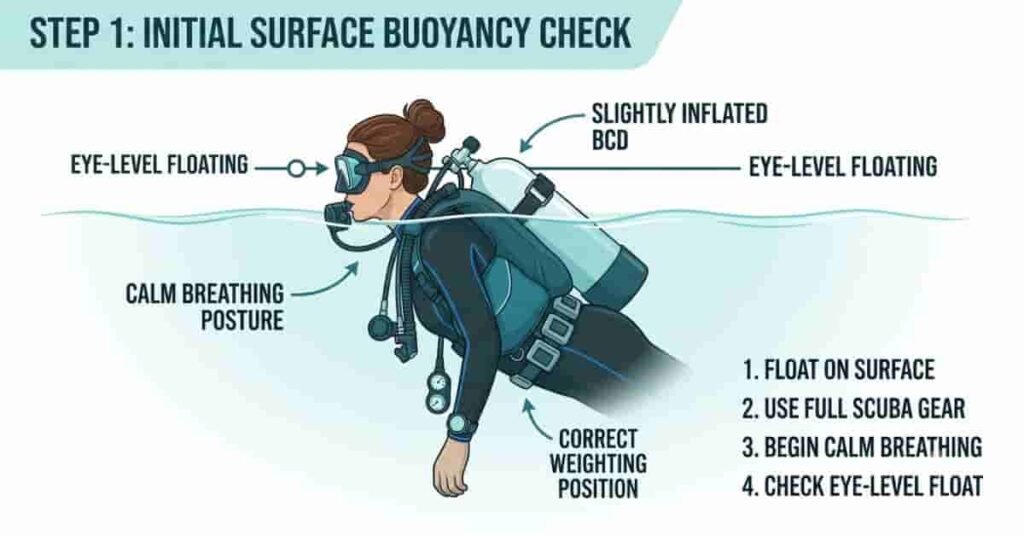
Your pre-dive buoyancy check helps you confirm your weight before starting the dive. This step creates a strong foundation for better control underwater. Beginners should perform this check whenever they use new gear, a different suit, or a new tank.
Start by entering the water with your BCD slightly inflated. Keep enough air inside to stay comfortable at the surface. Your goal is to check whether your current weight allows you to float naturally.
Take a normal breath and hold it briefly. With an empty BCD, you should float around eye level. When you exhale, your body should slowly begin to sink. If you drop quickly, you may have too much weight. If you cannot descend, you may need less air in your BCD or a small weight adjustment.
This simple neutral buoyancy test helps you find the right balance before descending. It prevents beginners from adding unnecessary weight, which can make movement harder.
Expert Tip: Make small weight changes instead of removing or adding large amounts. A small adjustment can greatly improve your comfort underwater.
Step 2 — Buoyancy Check During Descent
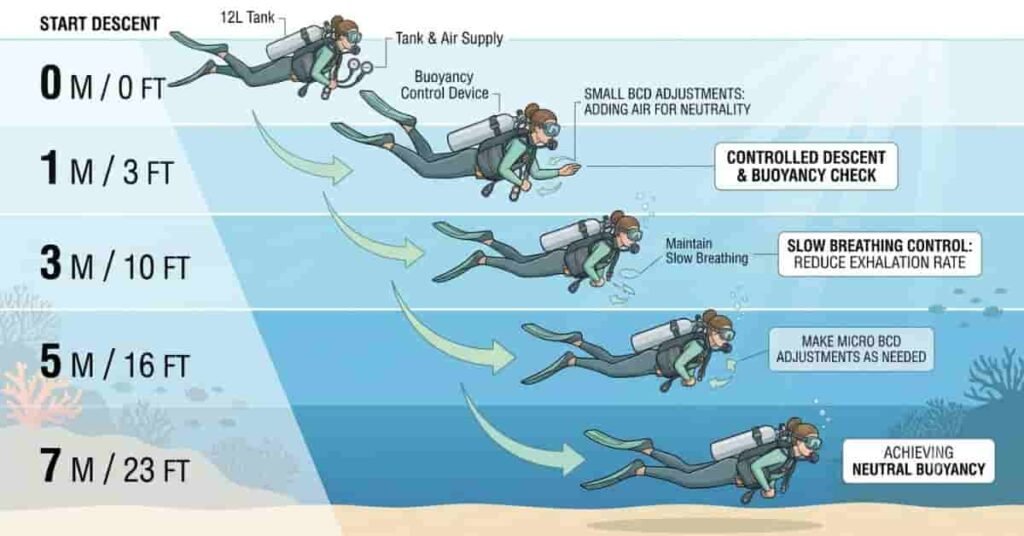
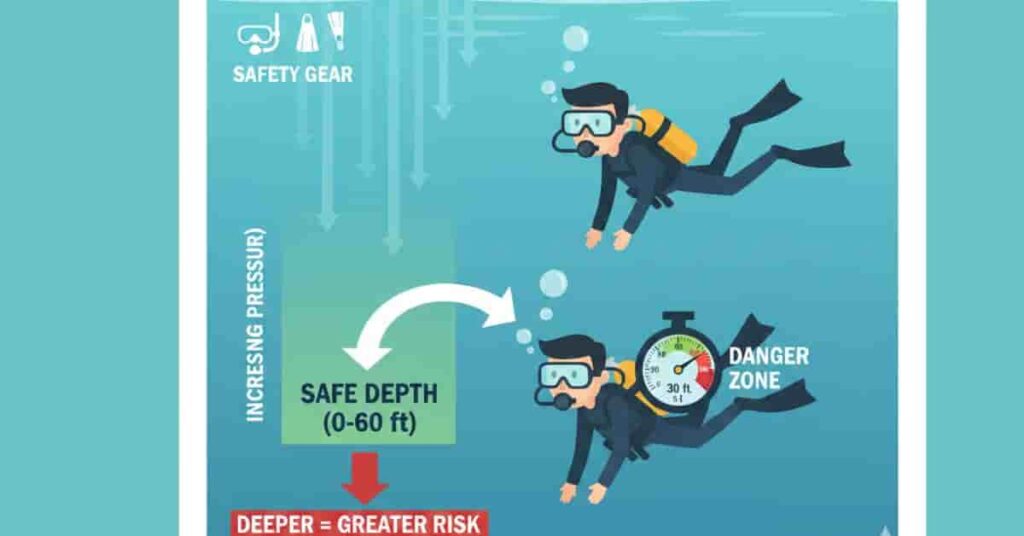
Your buoyancy changes as you descend because water pressure affects your equipment and exposure suit. A controlled descent helps you adjust safely and maintain comfort.
Begin your descent slowly while equalizing your ears regularly. Avoid dropping quickly toward deeper water. Fast descents make it harder to manage buoyancy and can create unnecessary stress.
Use small BCD adjustments when needed. Add tiny amounts of air to your BCD rather than making large changes. Your breathing also plays an important role. Slow, steady breaths help you control small movements without constantly adjusting your equipment.
Many beginners make the mistake of using their inflator too often during descent. Good buoyancy control comes from combining proper weighting, breathing control, and small equipment adjustments.
A calm descent gives you time to check your position and prepare for the dive ahead. It also helps you avoid sudden movements near the bottom.
Expert Tip: Focus on slow breathing during descent. Your lungs act like a natural buoyancy tool when you control your breathing pattern.
Step 3 — Buoyancy Check at Dive Depth
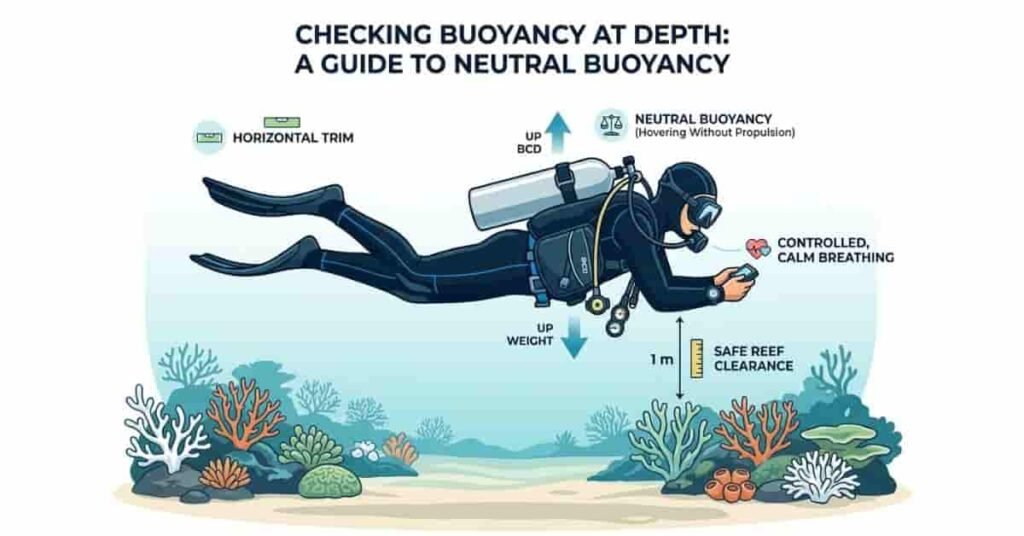
Once you reach your planned depth, perform another buoyancy check before continuing the dive. This step helps you confirm your position and improve your underwater control.
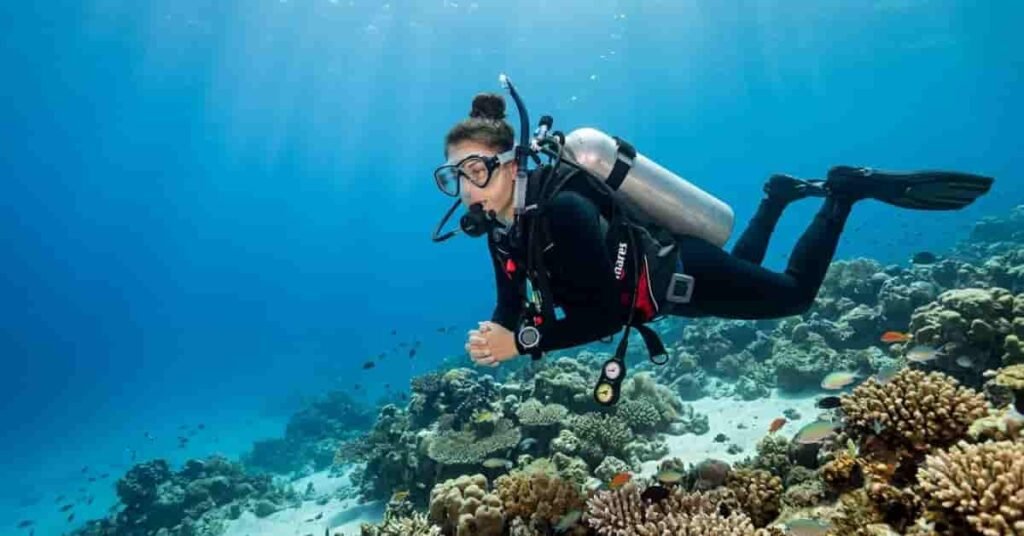
Stop moving and practice hovering in the water column. Your body should remain stable without kicking or using your hands. A proper hover shows that you have good weight balance and breathing control.
Next, check your horizontal trim. Your body should stay in a comfortable, streamlined position. Keep your head slightly raised, hips level, and fins positioned behind you. Good trim reduces effort and helps you move through the water more efficiently.
Use small adjustments with your BCD and lungs to fine-tune your position. Avoid making large changes because they can cause unwanted movement. Your goal is to maintain neutral buoyancy while staying a safe distance above the bottom or reef.
A strong scuba diving buoyancy check at depth improves your confidence and protects underwater environments. It also helps you complete a more relaxed dive.
Expert Tip: Practice hovering for 30–60 seconds during training dives. This builds control and helps you notice small buoyancy changes.
Step 4 — Continuous Buoyancy Monitoring
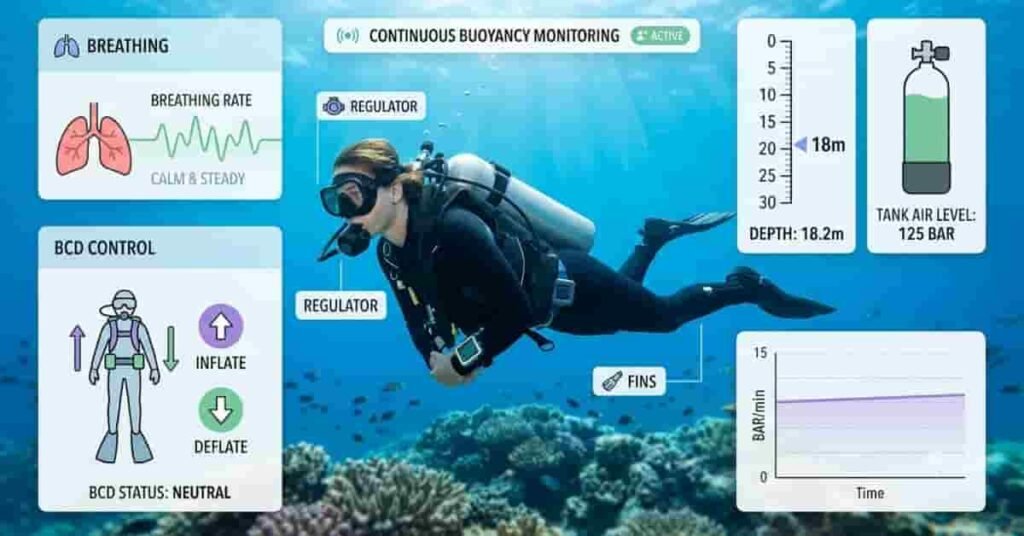
Buoyancy control does not end after your first check. Experienced divers continue monitoring their position throughout the entire dive. Conditions can change as depth, breathing, and equipment affect your balance.
During the dive, recheck your buoyancy regularly. Notice whether you are slowly rising, sinking, or using your fins too much to stay level. Small corrections help you maintain a comfortable position without wasting energy.
Your tank also becomes lighter as you use the air inside it. This change can make you slightly more buoyant near the end of the dive. Understanding this adjustment helps you prepare for a controlled ascent.
A proper scuba diving buoyancy test is not just a one-time action. It is a continuous skill that improves with practice. Maintaining neutral buoyancy helps conserve air, reduces fatigue, and allows better control underwater.
Divers who master these habits usually enjoy calmer and safer dives. They can focus more on marine life and less on correcting their position.
Expert Tip: Avoid depending only on your fins for position control. Your breathing and BCD should handle most buoyancy changes.
Common Mistakes During Buoyancy Checks
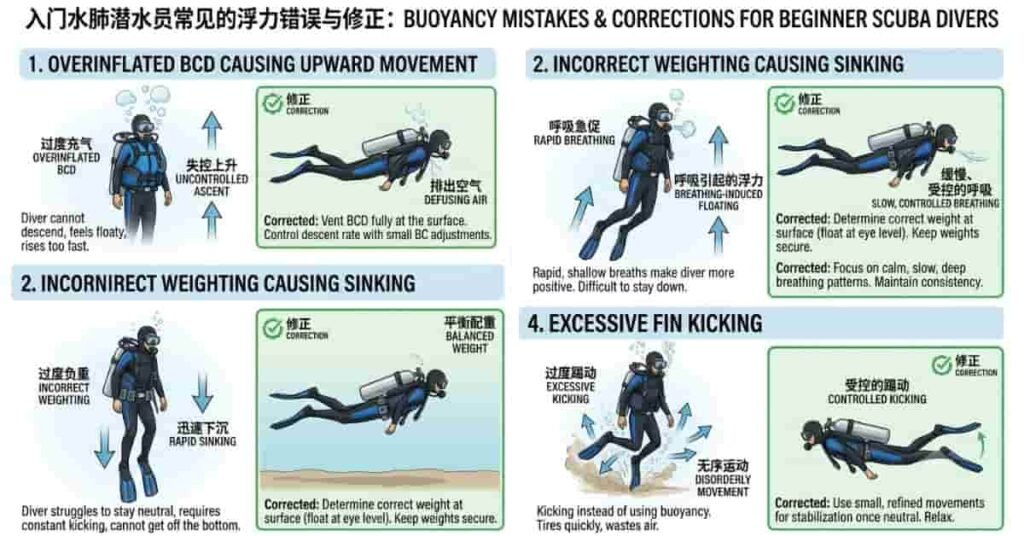
Many beginners struggle with buoyancy because they make small setup or control mistakes. These mistakes can affect comfort, air consumption, and overall dive safety. Understanding common problems helps you build better habits during every scuba diving buoyancy check.
Overinflating the BCD
Adding too much air to your BCD is one of the most common mistakes. Some new divers add large amounts of air when they feel heavy underwater. This can cause sudden upward movement and make control difficult.
Use small adjustments instead. Add only enough air to maintain your position. Your breathing should handle small changes, while your BCD manages larger corrections.
Forgetting Tank Weight Changes
Your tank becomes lighter as you breathe air during the dive. This change can slowly increase your buoyancy near the end of your dive. Beginners sometimes forget this and struggle to maintain their position during the safety stop.
A proper scuba diving buoyancy test includes awareness of how your equipment changes throughout the dive.
Rapid Breathing and Floating Up
Fast breathing can make you rise because your lungs hold more air. Nervous beginners often breathe quickly when they feel uncomfortable underwater.
Focus on slow, steady breaths. Calm breathing improves control and helps you stay relaxed.
Relying Only on Fins
Your fins help with movement, but they should not control your buoyancy. Constant kicking to stay level wastes energy and increases air consumption.
Use proper weighting, controlled breathing, and small BCD adjustments together. These skills create better stability and a smoother dive.
Expert Tip: If you constantly adjust your fins or BCD, stop and check your breathing pattern first. Many buoyancy problems start with breathing habits.
Conclusion
A proper buoyancy check scuba diving routine helps you improve control, safety, and confidence underwater. You learned how to prepare your gear, check your weighting, adjust during descent, and maintain neutral buoyancy throughout your dive.
Practicing these steps on every dive helps beginners build strong habits. A consistent scuba diving buoyancy check can improve air use, reduce stress, and create a smoother underwater experience.
Keep improving your skills by exploring our guides on [Buoyancy Control Tips Article], [Common Buoyancy Problems Article], and [Neutral Buoyancy Article]. These resources can help you become a more comfortable and confident diver.
Have your own buoyancy tips or experiences? Share them with other divers and keep practicing every time you enter the water.
FAQs About Buoyancy Checks
You should perform a buoyancy check before every dive, especially when your equipment or environment changes. Different wetsuits, tanks, and water conditions can affect your buoyancy. Beginners should always complete a quick check before entering deeper water. Experienced divers also repeat checks when using new gear or diving in unfamiliar locations.
If you keep sinking, check your breathing, BCD, and weight system first. Avoid adding large amounts of air or making sudden adjustments. You may be carrying too much weight or your BCD may not be fully empty during testing. If the problem continues, ask a certified instructor or experienced diver to review your weighting and trim.
Beginners can learn buoyancy checks, but early practice should happen with a buddy or instructor nearby. During training, instructors teach safe weighting, BCD control, and hovering techniques. Once you gain experience, you can perform your own checks confidently while continuing to follow safe diving practices.
A proper buoyancy check improves safety, comfort, and underwater control. It helps you maintain neutral buoyancy, move smoothly, and avoid unnecessary fin kicking. Better buoyancy also helps conserve air, reduces fatigue, and protects reefs by preventing accidental contact with marine life.
The best time to check buoyancy is at the surface and again at your planned dive depth. Surface checks confirm your initial weighting, while depth checks help you adjust for pressure changes. At depth, practice hovering and confirm that you can maintain your position without constant fin movement.
Scuba tanks affect buoyancy because they become lighter as you breathe air from them. A full tank is heavier at the start of a dive, while a nearly empty tank becomes more buoyant near the end. Understanding this change helps divers maintain better control throughout the dive.

Scuba Diving Researcher & Beginner Guide
Evan Calder is the creator of DiveBeginner, a website dedicated to helping beginners learn scuba diving simply and practically 🌊
He focuses on scuba fundamentals, beginner safety, and clear diving guidance. Evan has studied ocean and marine science through programs at the Scripps Institution of Oceanography, UC San Diego, a globally recognized leader in ocean research.
Instead of complex technical language, Evan provides easy-to-follow, beginner-friendly guides based on real-world research, helping first-time divers feel confident before their first dive 🤿
DiveBeginner reflects his passion for making scuba diving accessible, safe, and enjoyable for everyone.